Ah.. fringe; you are certainly not going anywhere! And it doesn't take Anna Wintour to figure that out...
From fringed jackets to dresses, it seems like we can't get enough of this 70s trend in our wardrobes.
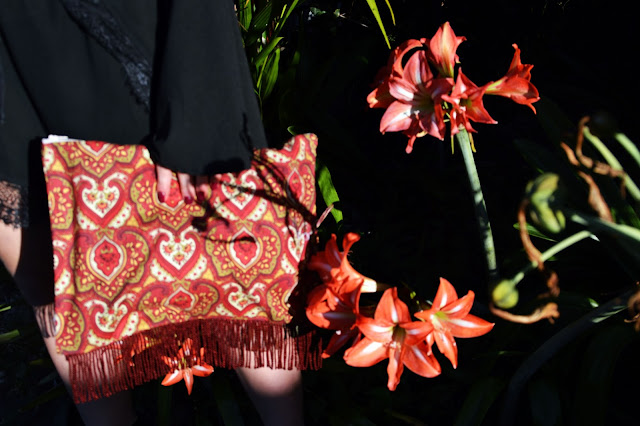
But what if I told you that you could get a brand new accessory for the price of just a few bits and bobs? Today, I put on my Captain Craft (who?) hat and created this bohemian print, fringe clutch bag. Yep, that's right: three trends in one!
And I've created this easy-to-follow tutorial so that you can get creative and make one too!
I'll admit; I'm not exactly the Nigella Lawson of the craft world! So if I can make this bad boy, so can you! And it takes barely any sewing.... Although you do have to use that needle and thread a
teeny bit.
But for a free boho-print, fringe clutch? Yep, I'm in: needle wounds and all!
You will need...
2 x pieces of boho printed fabric 17.5 x 12.5 inches
2 x pieces of lining fabric (any thick, shiny fabric is suitable) 17 x 12 inches
Fabric Scissors
Fringe Trim measuring 14 inches
A zip measuring 14 inches
Needle
Around 20 pins
Iron
2 rolls of stitch-free, iron-on trim/fabric seamer
Firstly, take a roll of cotton in a similar colour to your zip. Thread your needle and you're ready to go!
Ok... I'll admit, the first part of this DIY is by far the hardest. But as the old proverb/your Nan/anyone says, it's best to get the worst bit done
first. So hold on there!The first thing to do is to secure the left side of the zip. Firstly open your zip and face it upwards so that the zip is towards you.
Then place the zip over the long side of one of your pieces of your lining. Ensure that the left side of the zip is around half a centimeter from the edge of the fabric, to make allowances for seams. Secure the zip in place with a few pins as close to the centre of the zip as possible to ensure it doesn't move. After all: no one likes a wonky zip!
Next, take one piece of your boho fabric and lay down the top longest edge directly over the left hand size of the zip, lining perfectly with your piece of lining. Once again, leave a centimeter of fabric for seam allowances.
IMPORTANT: Place your fabric print side down.Now you should have some sort of funky zip sandwhich!
Secure the lining, zip and fabric together with a straight line of pins.
Flip out your work of art inside out to check that your seam is straight enough. Give the zip a test too! Does it work? Awesome! Moving on...
Flip that boho fabric back over so you have your perfectly pinned sandwich again. Then sew along the pins. I hand sewed mine, but if you are blessed with a sewing machine, go for it girl! (And I am SO not jealous...)
Want to know the good news?
You've got to do it all again! But this time with your other pieces of fabric and on the right hand side of the zip. Ok. Sarcasm over. The nasty zip stuff will be over with before you know it.
Go ahead and re-arrange your clutch-in-the-works do that it is facing you with the zip towards you in a V-shape. Your work-in-progress should be on the left hand side of the zip.
Take your other piece of lining and place under free side of zip. Place the zip at the end of the longest side of the fabric, around a centimeter from the fabrics edge. Pin in place.
Place your boho fabric on top of the zip
pretty side down and pin the three layers together. Turn inside out to check if your pinning is straight and if the zip works well. Then sew away!
And now take a deep breath and rejoice: The hideous zip part is done! **Hallelujah chorus**
Now your zip should be secured on both sides and should look neat and tidy like this.
Next, it's time to bond the lining and the boho fabric together. If you've never used iron-on bonding trim before, its basically a sewing
cheat shortcut. Once again, if you have a sewing machine, feel free to seam join the fabrics by thread, rather than by bonding trim.
Separate your fabric so that three layers are to the right and you are left with one layer of boho fabric. Cut a piece of bonding trim the size of the short side of the piece,. Place along the length of the fabric then flip the adjoining piece of lining fabric back over.
Secure with an iron and repeat on the other two edges. Then repeat on the right hand of lining and fabric.
Now, it's time to hem the edges!
Place a piece of bonding tape along each edge about an inch in from the edge. Fold the inch of fabric over and on top of the bonding tape. Secure with an iron. Repeat on all 6 hems.
Now your clutch should look neatly hemmed:
Next, it's time to fold this piece of fabric over to secure into a clutch bag.
Simply place a piece of bonding strip along one of the bottom lengths (either side of the zip), leaving an inch free of bonding at the outer edges.
Fold the clutch over and iron to secure. Repeat on the top length. Your clutch should be secured on all sides apart from the bottom.
Cut your fringe trim so that it is exactly the same length as the bottom edge of your clutch.
Cut a piece of bonding strip the same length as the bottom edge of the clutch and lay between the two layers of fabric.
Then place your trim directly on top of the bonding strip. Top with another layer of bonding strip.
Iron the three layers together to secure.
And **insert drum roll here** Ta-da!
Now you have this seasons hottest accessory! Plus: no one else will have the same one!
So get ready to answer those 'ooo where did you get that?' queries with a smug smile.
'Oh this? I just made it...'
Hope you liked this DIY! Get crafty!
Rachel
xoxo


 70s, lace-up, flowy


 Denim Top: Style Moi


